Step 1 - the Repositories
Changes in the code repositories are the source of all the work performed by the CI/CD pipelines. By reacting in an automated fashion to those changes, pipelines help developers (of code, documentation and/or whatever plain-text based data) in the maintenance tasks.
There are two main approaches when it comes to linking CI/CD pipelines with code:
- Place your pipeline next to the code, i.e. in the same repository where the source code is handled.
- Place your pipeline in a separate repository.
Approaches to link pipeline & code
Handling both code and the CI/CD pipeline in the same repository is the recommended approach (unless there are specific constraints within the software project), and it is indeed the default behavior within most CI solutions.
As a matter of fact, if your pipeline only needs to work with the existing code, this step can be skipped (this is the reason behind marking it as optional) since the contents will be fetched automatically.
Defining repositories#
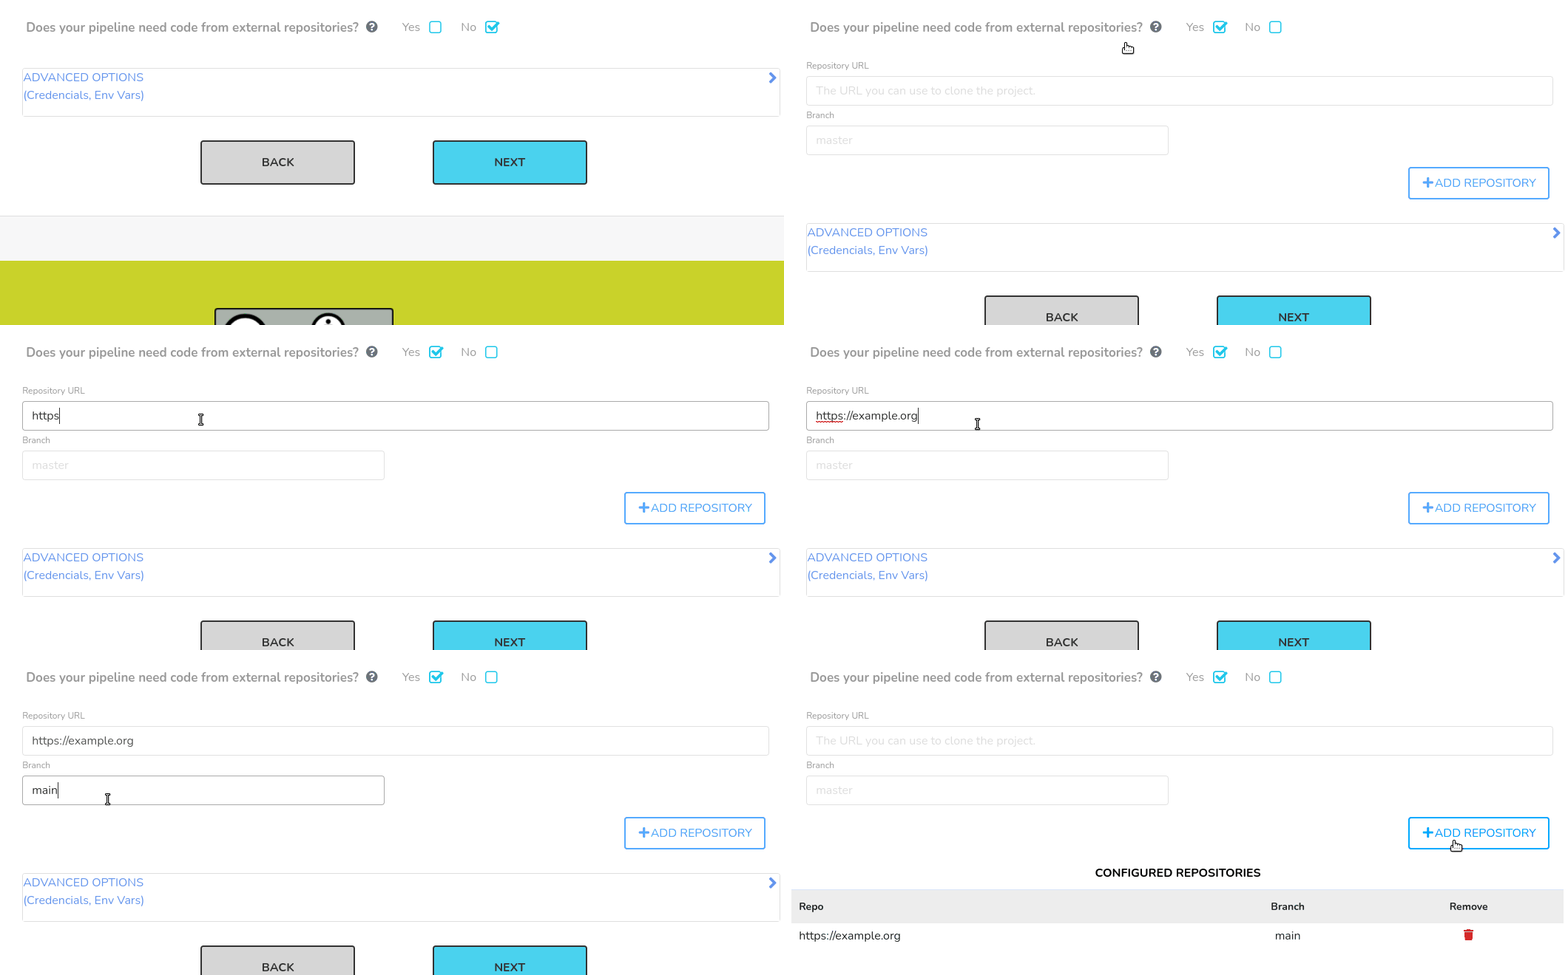
The Repository view let's you define any "external" (i.e. not the repo that contains the CI/CD pipeline) repository that shall be accessible during the pipeline execution. There are a number of reasons why you would like to do that as when the documentation (docs-as-code) or deployment files (Infrastructure as Code) are maintained outside the main repository.
First, enable the repository definition by clicking on the Yes checkbox.
The + Add repository form will open up so that you can specificy the i) URL
and ii) branch from the repository to be fetched. You can add as many external
repositories as you want.

Advanced options#
The Repository view offers additional features for more complex scenarios: credentials and environment customization.
Credentials#
Credentials (Add Credentials section) are used whenever the pipeline is
required to access an external service that enforces authentication, such as
private code repositories or push-permissions to container registries.
Since the current implementation of the SQAaaS uses the JePL library for the pipeline definition, which in turn relies on Jenkins CI, the [type of credentials are those supported by this latter technology] (https://www.jenkins.io/doc/book/using/using-credentials/). As a result, the credential identifier to be used has to be previously defined in Jenkins before being used in this section. This is a limitation we expect to solve in future versions.

Once the credentials' form has been filled out, click on Add Credentials for
the SQAaaS to track them.
Environment#
The Customize Environment section allows you to set environment variables
that will be accessible at runtime. You can add as many variables as you like
by clicking on Add Env Var button.
